Occupancy Measurement Tools: Save Energy in 2026
Your utility bill is probably paying to heat and light rooms nobody is in right now. That is not a guess; it is just how most homes work. Studies on residential energy waste consistently point to the same culprit: rooms sitting occupied by nothing but furniture while the thermostat and the lights run anyway. Occupancy measurement tools fix that problem without much effort or expense, and you do not need to be technical to use one.
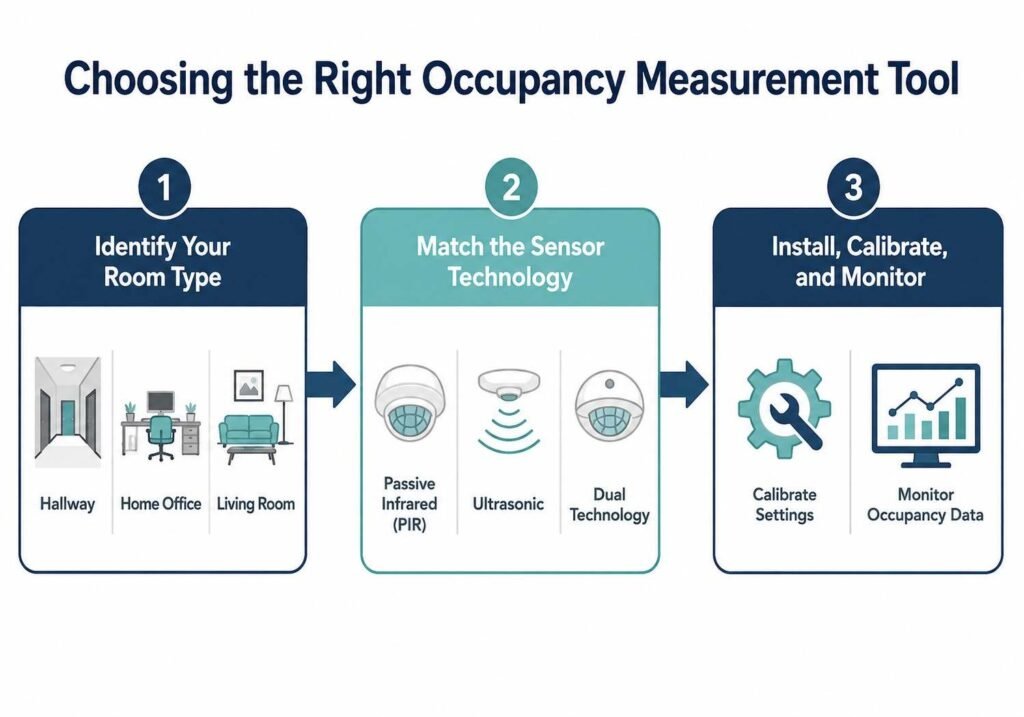
This guide walks you through every major sensor type, what each one actually costs, where to place it, how to avoid the mistakes most people make on their first attempt, and which combination fits your household best, whether that is a house full of kids, a small rental, a place you just bought, or a home you are trying to downsize out of. By the end you will know exactly which tool to buy and where it belongs.
What These Tools Are Actually Doing
An occupancy sensor is really just answering one question over and over. Is somebody in this room right now? That yes-or-no answer ends up controlling a surprising amount: lights, thermostats, security alerts, even how a smart home app logs your day.
Why People Care About This Now
Energy costs have gone up, and a lot of utility providers now give rebates for homes running verified smart sensors. But money is not the only reason people install these. Some families use them to quietly check on a parent who lives alone. Others just want proof their home office actually gets used before they keep paying for a coworking membership they barely touch. A growing number of people also use them for pure curiosity, wanting an honest answer to a question most of us never actually measure: which rooms in the house do we really live in.
Stillness Trips People Up
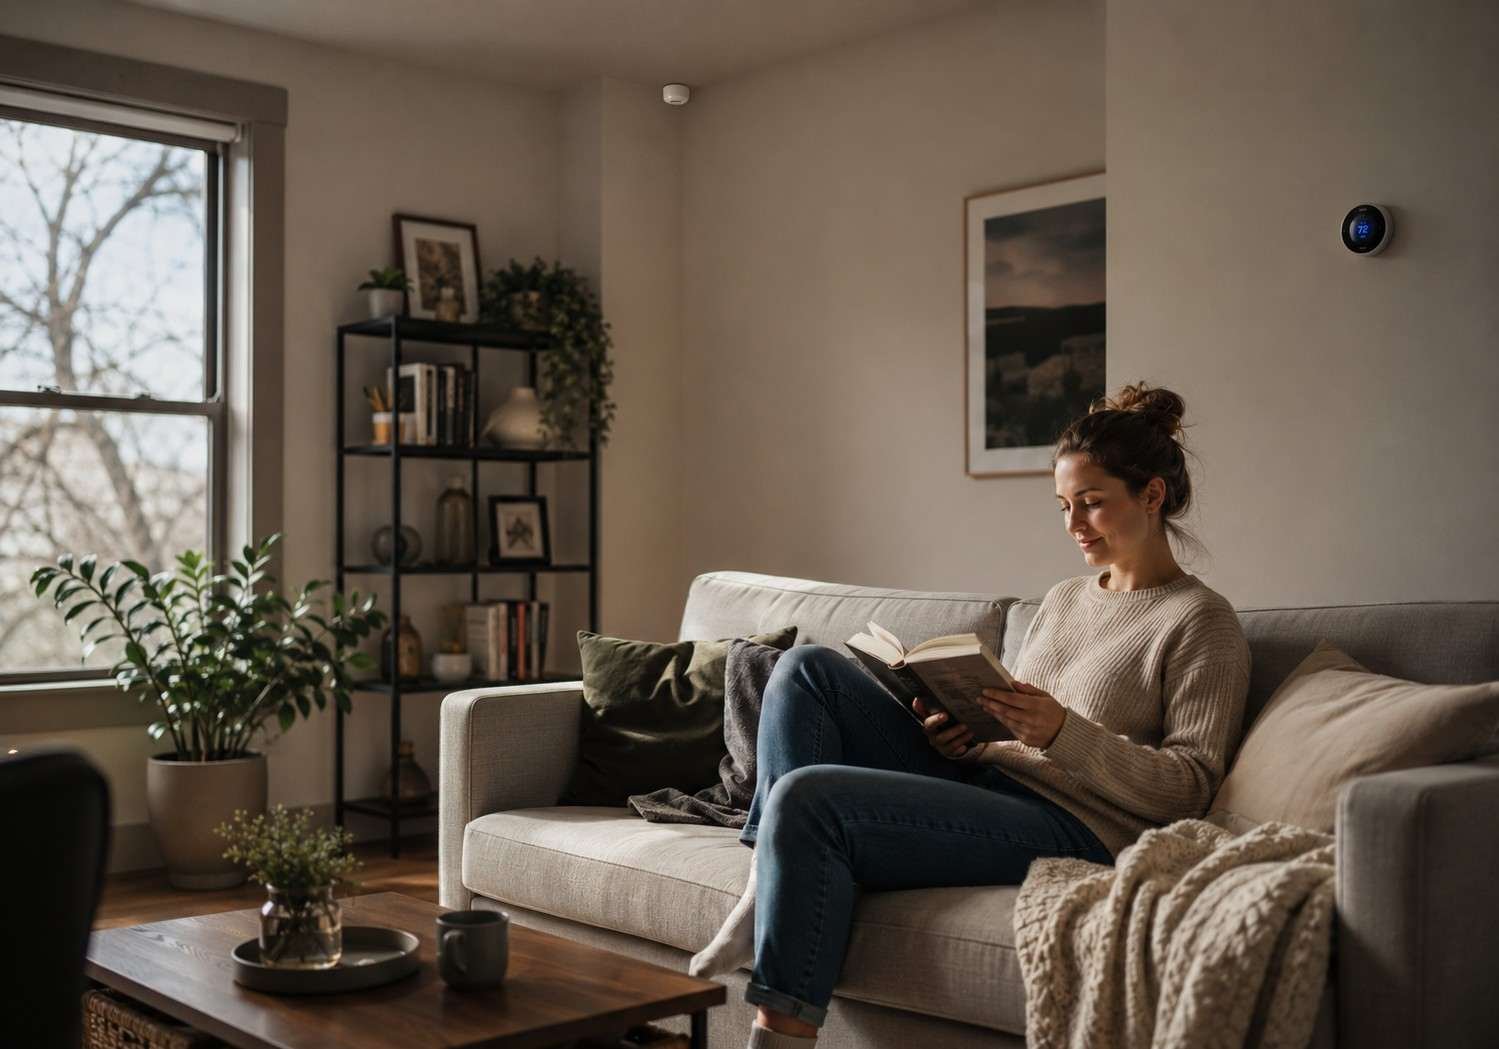
Here is where a lot of confusion comes from. A basic motion sensor only cares about movement. A true occupancy sensor knows you are still in the room even if you have not moved in twenty minutes. If you have ever gotten plunged into darkness mid-book on your own couch, you already know which one you have. This distinction sounds minor until you live with it every single day, and it is the single biggest source of frustration people report after installing their first sensor.
The Difference Between Detection and Measurement
It helps to separate two related ideas early on. Detection just tells you yes or no, someone is here. Measurement goes further, logging how long someone stayed, how often the room gets used across a week, and sometimes even how many people are present at once. If your goal is simply automating a light switch, detection alone is enough. If your goal is understanding how your household actually uses space, you want a tool that measures, not just detects.
How This Fits Into a Broader Smart Home Strategy
Occupancy tools rarely work best on their own. Paired with a smart thermostat, they stop wasting energy on empty rooms. Paired with smart lighting, they cut down on the small daily habit of flipping switches that nobody actually enjoys. Paired with a security system, they add a layer of context that a simple door sensor cannot offer, since knowing a room has had unexpected activity at three in the morning is far more useful than just knowing a door opened. Thinking of occupancy sensors as one piece of a larger system, rather than a standalone gadget, tends to produce the best results over time.
The Sensor Types, and Where Each One Falls Short
No sensor is perfect. Knowing the weak point of each type saves you from buying the wrong one.
Passive Infrared Sensors
PIR sensors are the cheap, reliable option most people already own without realizing it. They pick up body heat moving across their field of view. Wikipedia’s page on passive infrared sensors explains that these are the same sensors behind most security lights and automatic faucets, mainly because they are affordable and hold up well over time.
The weak point is stillness. Sit at a desk without moving much, and the lights will eventually shut off on you. Almost everyone with a home office has a story about this. PIR sensors also struggle in very cold or very hot rooms, since the sensor works by picking up the contrast between a person’s body heat and the ambient temperature. When the room itself is already warm, that contrast shrinks and the sensor becomes noticeably less reliable.
Ultrasonic Sensors
These send out sound you cannot hear and read what bounces back, which lets them catch tiny movements a PIR sensor would miss. Good for oddly shaped rooms where a straight line of sight is hard to achieve. Bad for rooms with ceiling fans, drafty curtains, or a cat that will not stay still. Because ultrasonic waves fill an entire room rather than a narrow beam, they also tend to work better in rooms with a lot of hard surfaces, since sound reflects cleanly off walls and furniture instead of getting absorbed the way it does in a room full of soft fabric.
Dual Technology Sensors
Combine the two above and require both to agree before calling a room occupied. Fewer false alarms, more expensive up front. Living rooms and nurseries are where this tradeoff usually makes sense, since a false trigger in a baby’s room, either turning a light on unexpectedly or turning one off while a parent is quietly nursing, causes real frustration.
Microwave and Radar Sensors
Radio waves instead of heat or sound, which means they can see through thin walls and glass. Useful in garages or converted spaces. Just test placement first, since they will sometimes pick up your neighbor walking around next door, not just your own room. This same sensitivity makes them a poor choice for shared walls in apartments or townhomes, where a sensor might register the unit next door as activity in your own space.
Camera-Based Sensors
The most detailed data you can get, including headcounts and rough positioning in a room. Popular for nurseries and elder care, since a caregiver can glance at an app and know not just that someone is in the room but roughly where they are standing or sitting. Also, the option that raises the most questions, which I get into further down.
WiFi and Bluetooth Presence Detection
Some smart hubs can already sense you just from how WiFi signals bounce around a room, no extra hardware needed. If you rent and cannot drill into anything, this is worth a look before you buy a single sensor. The tradeoff is precision. These systems are good at telling you a general area of a home is occupied, but they struggle to pin down which specific room within an open floor plan, so they work best in smaller apartments rather than sprawling houses.
Pressure Mats
Simple, cheap, and effective for one specific spot. Slide one under a rug or a mattress and you will know the second someone steps on or off it. Common for tracking whether an older relative has gotten out of bed, or for confirming a toddler has actually climbed out of a crib rather than just shifted position inside it.
A few things worth remembering before you buy anything at all:
- Stay away from pure ultrasonic sensors near vents or fans; they trigger constantly on air movement
- Go with adhesive mount or WiFi-based sensors if you rent and cannot drill
- Skip camera-based sensors if privacy worries you; dual-technology sensors do most of the same job without video
Comparison Table
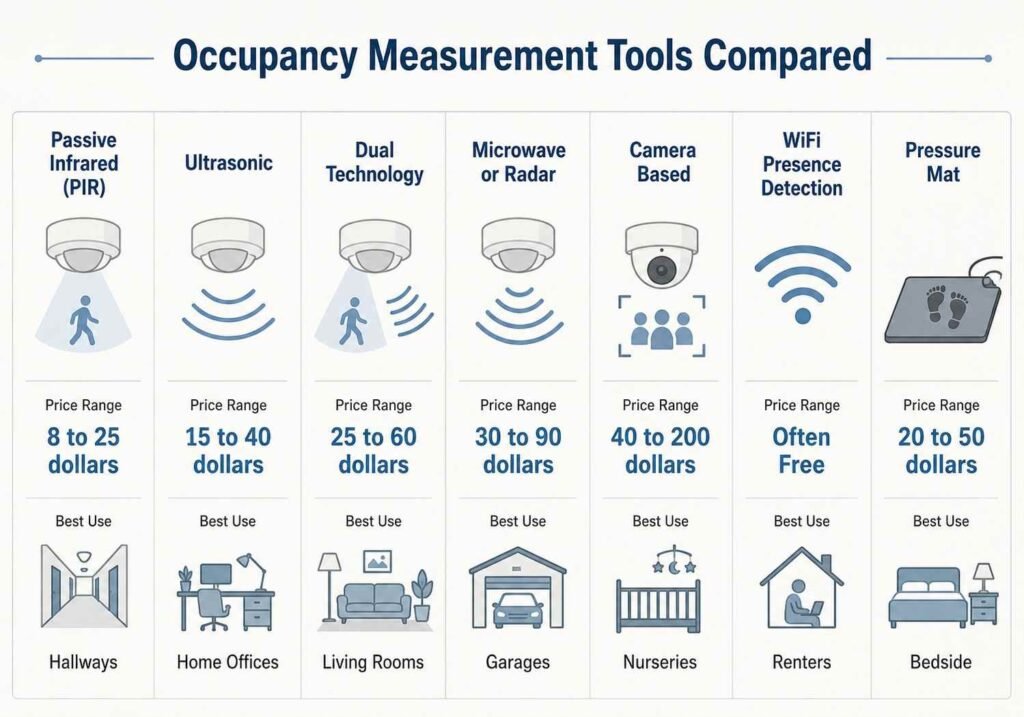
| Tool Type | Detects Stillness | Approximate Cost | Best For | Main Drawback |
|---|---|---|---|---|
| PIR Sensor | No | 8 to 25 dollars | Hallways, closets, garages | Shuts off lights on stationary people |
| Ultrasonic Sensor | Yes | 15 to 40 dollars | Home offices, oddly shaped rooms | False triggers from drafts or fans |
| Dual Technology Sensor | Yes | 25 to 60 dollars | Living rooms, nurseries | Costs more upfront |
| Microwave or Radar Sensor | Yes | 30 to 90 dollars | Garages, open-concept spaces | May detect through walls unintentionally |
| Camera-Based Sensor | Yes | 40 to 200 dollars | Nurseries, elder care | Raises privacy questions |
| WiFi Presence Detection | Yes | Often free with your router | Renters: no drilling allowed | Less precise room boundaries |
| Pressure Mat | Yes | 20 to 50 dollars | Bedside, doorway monitoring | Only covers one specific spot |
Which Tool Fits Your Situation
Busy Parents and Families
Put dual-technology sensors where the family actually gathers, and cheaper PIR sensors in the hallways and closets nobody lingers in. A pressure mat by a crib or an aging parent’s bed adds a safety net without a camera watching the room. Families with teenagers also find real value here, since a sensor can quietly confirm whether a bedroom light was left running all day without anyone needing to ask.
Apartment Dwellers and Small Space Residents
Renters do best with WiFi presence detection or battery-powered PIR sensors that just stick on with adhesive. No drilling, and you can take them with you when the lease ends. In a small apartment, one or two well-placed sensors often cover the entire living space, so there is rarely a need to buy more than a handful of units.
First-Time Homeowners
You have room to plan properly here, especially if any renovation is already underway. PIR sensors in the low-traffic spots are dual technology, where lighting mistakes would actually bother you. This is also the easiest group to wire sensors into an electrical box directly, since walls are often already open during other renovation work, which usually costs less than adding hardwired sensors later.
People Moving or Downsizing
This is where room utilization tracking earns its keep. Sensors in every room for two to four weeks before you commit to a smaller place will tell you, honestly, which rooms you use and which ones just look nice in the listing photos. Some people are surprised to learn that a guest room used twice a year is not worth carrying into a smaller home, while a modest home office gets used daily and deserves priority in the new floor plan.
Installing These Without Making Rookie Mistakes
A great sensor in the wrong spot performs worse than a mediocre one placed thoughtfully.
Placement
Aim it toward the main entry point of the room. Seven to nine feet up usually gives the widest useful view in a living room without catching every move your dog makes across the floor. In smaller rooms like bathrooms or closets, a corner mount near the door tends to work better than a center ceiling mount, since it captures anyone entering before they even reach the middle of the room.
Timeout Settings
Most sensors ship set to shut off after five to fifteen minutes, which is nowhere near long enough for a reading chair or a desk. Stretch that to twenty or thirty minutes in rooms where people sit still and most complaints disappear. Hallways and bathrooms are the exception, where a shorter timeout of two to five minutes actually saves more energy without causing the annoying early shutoff that plagues stationary rooms.
Interference You Might Not Expect
Direct sunlight, a vent blowing straight across the sensor, and mirrors reflecting movement from elsewhere in the room—all of these throw off readings. Test at a few different times of day before deciding your placement is final. This YouTube comparison of PIR and ultrasonic sensor placement shows the difference pretty clearly in real rooms rather than a lab setting.
Battery Life and Long-Term Reliability
Most battery-powered sensors last between one and two years depending on how often they trigger, and a quick check every few months prevents the frustrating experience of a light switch that suddenly stops working for no obvious reason. Sensors placed in high-traffic areas like a kitchen or a main hallway will drain faster than ones tucked into a rarely used guest room, so it helps to check the busiest sensors first when troubleshooting a dead unit.
Here are a few habits worth building once your sensors are in place:
- Test new placements at different times of day before calling the setup final
- Replace batteries proactively in high-traffic rooms rather than waiting for a failure
- Recheck sensitivity settings after rearranging furniture, since a moved couch or shelf can change what a sensor picks up
Making the Data Actually Useful
Dashboards
Most smart home platforms now break down occupancy by room and by hour. This is usually how a family finds out the home office sits empty most afternoons, or the playroom barely gets touched despite costing the most to heat. Some platforms even generate a simple weekly report, which turns what would otherwise be a pile of raw sensor logs into something you can glance at over coffee.
Real Savings, in Dollars
Pair sensors with a smart thermostat and a few smart plugs, and you can see the actual cost of heating a room nobody uses for a month. A specific dollar number changes habits faster than any vague reminder to conserve energy. Households that track this closely often find one or two rooms responsible for a disproportionate share of their energy bill, and simply adjusting the schedule for those specific rooms can produce noticeable savings within the first billing cycle.
Building Your Own Simple Tracker
If spreadsheets do not scare you, some sensor brands let you export raw occupancy logs. A family planning to downsize can build a basic table tracking which rooms get used across a month, which makes picking a smaller floor plan far less of a guessing game. There is an active Quora discussion on choosing home occupancy sensors where people compare notes on which sensors export cleanly.
Privacy Without Giving Up Convenience
Occupancy logs, even the ones without a camera involved, reveal a fair amount about daily habits, including exactly when a home sits empty. That is worth taking seriously. Storing data locally on a hub rather than a cloud account, and turning off any setting that shares information with outside advertisers, are both simple steps that meaningfully cut down the risk without giving up any of the convenience the sensors provide.
A short list worth keeping in mind before storing any of this data:
- Keep logs on a local hub rather than a cloud service whenever that option is available
- Turn off anything that shares your data with third-party advertisers
- Ask whether a camera-based sensor processes footage locally or ships it off to a server, and how long that footage is kept
Common Mistakes People Make When Choosing Occupancy Sensors
Most sensor complaints trace back to one of a handful of avoidable mistakes, not a defective product.
Buying One Sensor Type for the Whole House
It is tempting to buy a dozen of the same sensor and call it done, but a hallway and a home office have completely different needs. A hallway barely needs anything beyond a basic PIR sensor, while an office where someone sits still for hours needs ultrasonic or dual technology detection. Treating every room the same is the single most common reason people end up frustrated within the first week.
Ignoring the Return Policy
Sensor performance depends heavily on your specific room, your furniture layout, and even your home’s construction materials, so a sensor that works perfectly for a reviewer online might behave differently in your space. Buying from a retailer with a reasonable return window lets you test a sensor for a week or two before committing to a whole house rollout.
Skipping the Manual Sensitivity Adjustment
Almost every sensor ships with a default sensitivity setting that is either too twitchy or too sluggish for the room it ends up in. Spending five minutes adjusting sensitivity after installation solves a huge share of the false trigger complaints people report, yet most buyers never touch this setting after the initial install.
Forgetting About Seasonal Changes
A sensor placed near a window that works flawlessly in winter can behave very differently once summer sunlight streams in at a lower angle or once a window air conditioner starts blowing air across its field of view. Revisiting placement and sensitivity twice a year, once as the seasons change, keeps performance consistent instead of degrading quietly over time.
Keep these points in mind as you shop, since they will save you both money and frustration:
- Match the sensor technology to what actually happens in that specific room, not a blanket choice for the whole house
- Buy from a retailer that allows returns so you can test real-world performance first
- Recheck sensitivity and placement seasonally, especially near windows or vents
Conclusion
Occupancy sensors have moved a long way past simple motion lights. Get them right and they save you real money, help you plan your space honestly, and keep a quiet eye on family members who need it. Match the sensor type to the room, lean away from cameras if privacy matters to you, and actually check the data instead of letting it sit unused in an app somewhere.
Pick one or two rooms you suspect are wasting energy or space. Watch what the sensor tells you over two weeks. You will learn more about how your home really gets used than any floor plan ever showed you.
Frequently Asked Questions
What is the most accurate occupancy measurement tool for a home?
Dual technology sensors, since they need two signals to agree before counting a room as occupied.
Can I use occupancy sensors without drilling into walls?
Yes. Adhesive-mounted battery sensors or WiFi presence detection both work well without any drilling.
Do these sensors really lower energy bills?
Yes, especially in rooms left occupied out of habit, like hallways and bathrooms.
Are camera-based sensors safe from a privacy standpoint?
They can be, as long as footage stays on the device rather than getting uploaded and stored elsewhere.
How many sensors does an average home actually need?
Three to five, placed in the busiest and most expensive rooms to heat, is a solid starting point.
What is the real difference between motion detection and occupancy detection?
Motion detection only notices movement, while occupancy detection also recognizes someone who is present but still.
Can these tools actually help with downsizing?
Yes. A few weeks of sensor data show exactly which rooms in your current home actually get used.
Will these sensors work with the smart home setup I already have?
Most support Zigbee, Z Wave, or WiFi, so compatibility is rarely a problem, but check first.